This documentation is available as Markdown for AI agents and LLMs. See the full Markdown index or append .md to any documentation URL.
ジェスチャーを追加する
ページを編集
このチュートリアルでは、React Native Gesture Handler と Reanimated ライブラリを使ってジェスチャーを実装する方法を学びます。
ジェスチャーは、アプリに直感的なユーザー体験をもたらす優れた手段です。React Native Gesture Handler ライブラリは、ジェスチャーを処理できるネイティブコンポーネントを組み込みで提供します。プラットフォームのネイティブなタッチ処理システムを使って、パン、タップ、回転などのジェスチャーを認識します。この章では、このライブラリを使って 2 種類のジェスチャーを追加します。
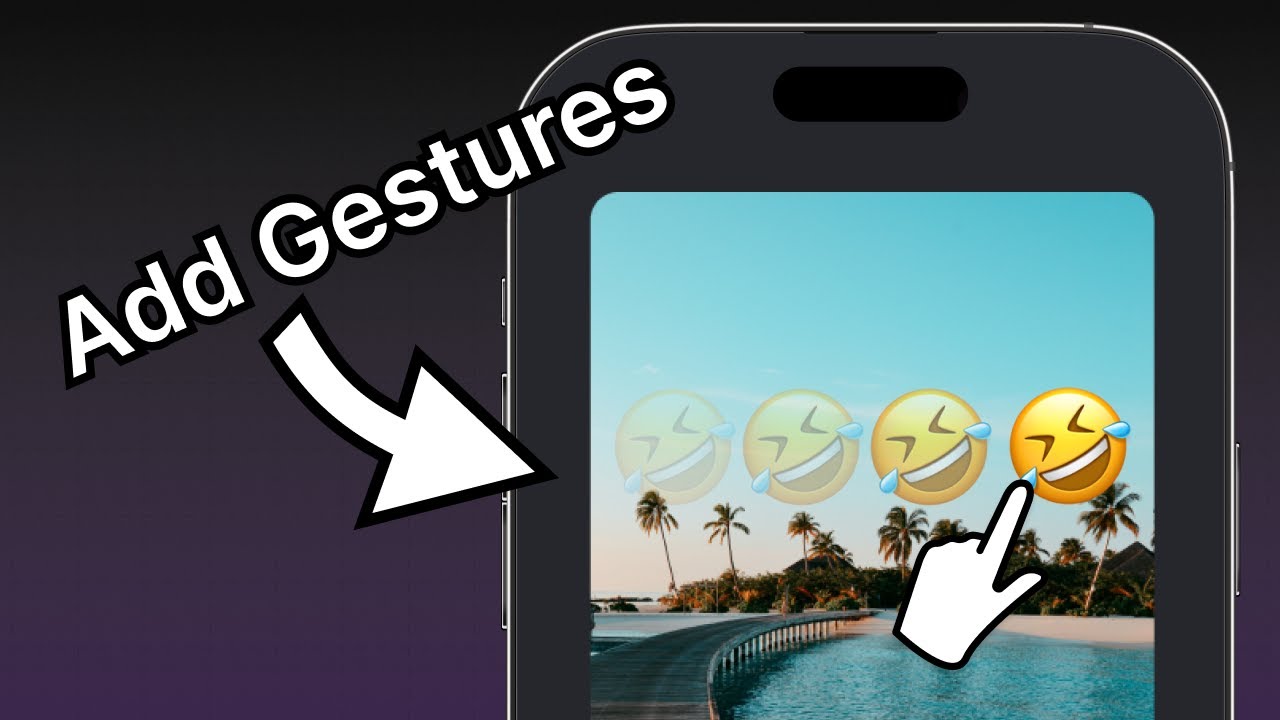
- ダブルタップで絵文字ステッカーのサイズを拡大し、もう一度ダブルタップすると元のサイズに戻します。
- パンで絵文字ステッカーを画面上で移動させ、画像のどこにでもステッカーを配置できるようにします。
また、ジェスチャーの状態間をアニメーションさせるために Reanimated ライブラリも使用します。
React Native Gesture Handler と Reanimated を使って、絵文字ステッカーにダブルタップとパンのジェスチャーを追加します。
1
GestureHandlerRootView を追加する
アプリ内でジェスチャー操作を機能させるために、Index コンポーネントの最上位に react-native-gesture-handler の <GestureHandlerRootView> をレンダリングします。app/(tabs)/index.tsx のルートレベルの <View> コンポーネントを <GestureHandlerRootView> に置き換えます。
// ... rest of the import statements remain same
import { GestureHandlerRootView } from 'react-native-gesture-handler';

export default function Index() {
  return (
    <GestureHandlerRootView style={styles.container}>
      {/* ...rest of the code remains */}
    </GestureHandlerRootView>
  )
}
2
アニメーション対応コンポーネントを使用する
Animated コンポーネントは、コンポーネントの style プロパティを参照してアニメーションさせる値を判断し、更新を適用してアニメーションを作成します。Reanimated は <Animated.View>、<Animated.Text>、<Animated.ScrollView> などのアニメーション対応コンポーネントをエクスポートしています。ここでは、ダブルタップジェスチャーを動作させるために <Animated.Image> コンポーネントにアニメーションを適用します。
- components ディレクトリ内の EmojiSticker.tsx ファイルを開きます。アニメーション対応コンポーネントを使うために、
react-native-reanimatedライブラリからAnimatedをインポートします。 Imageコンポーネントを<Animated.Image>に置き換えます。
import { ImageSourcePropType, View } from 'react-native';
import Animated from 'react-native-reanimated';

type Props = {
  imageSize: number;
  stickerSource: ImageSourcePropType;
};

export default function EmojiSticker({ imageSize, stickerSource }: Props) {
  return (
    <View style={{ top: -350 }}>
      <Animated.Image
        source={stickerSource}
        resizeMode="contain"
        style={{ width: imageSize, height: imageSize }}
      />
    </View>
  );
}
アニメーション対応コンポーネント API の完全なリファレンスについては、React Native Reanimated のドキュメントを参照してください。
3
タップジェスチャーを追加する
React Native Gesture Handler を使うと、ダブルタップイベントなどのタッチ入力を検出したときの動作を追加できます。
EmojiSticker.tsx ファイル内で:
react-native-gesture-handlerからGestureとGestureDetectorをインポートします。- ステッカーのタップを認識するために、
react-native-reanimatedからuseAnimatedStyle、useSharedValue、withSpringをインポートし、<Animated.Image>のスタイルをアニメーションさせます。 EmojiStickerコンポーネント内で、useSharedValue()フックを使ってscaleImageという参照を作成します。初期値にはimageSizeの値を使用します。
// ...rest of the import statements remain same
import { Gesture, GestureDetector } from 'react-native-gesture-handler';
import Animated, { useAnimatedStyle, useSharedValue, withSpring } from 'react-native-reanimated';

export default function EmojiSticker({ imageSize, stickerSource }: Props) {
  const scaleImage = useSharedValue(imageSize);

  return (
    // ...rest of the code remains same
  )
}
useSharedValue() フックを使って共有値を作成すると、多くの利点があります。データを変更したり、現在の値に基づいてアニメーションを実行したりするのに役立ちます。共有値には .value プロパティでアクセスして変更できます。初期値をスケーリングする doubleTap オブジェクトを作成し、Gesture.Tap() を使ってステッカー画像をスケーリングしながらアニメーションを実行します。必要なタップ回数を指定するために numberOfTaps() を追加します。
EmojiSticker コンポーネント内に次のオブジェクトを作成します。
const doubleTap = Gesture.Tap()
  .numberOfTaps(2)
  .onStart(() => {
    if (scaleImage.value !== imageSize * 2) {
      scaleImage.value = scaleImage.value * 2;
    } else {
      scaleImage.value = Math.round(scaleImage.value / 2);
    }
  });
アニメーションさせるために、スプリングベースのアニメーションを使用します。実世界のスプリングの物理に基づいているため、生き生きとした感覚になります。react-native-reanimated が提供する withSpring() 関数を使用します。
ステッカー画像では、useAnimatedStyle() フックを使ってスタイルオブジェクトを作成します。これにより、アニメーション時に共有値を使ってスタイルを更新できます。さらに、width と height プロパティを操作して画像のサイズをスケーリングします。これらのプロパティの初期値は imageSize に設定されています。
imageStyle 変数を作成し、EmojiSticker コンポーネントに追加します。
const imageStyle = useAnimatedStyle(() => {
  return {
    width: withSpring(scaleImage.value),
    height: withSpring(scaleImage.value),
  };
});
次に、<Animated.Image> コンポーネントを <GestureDetector> でラップし、<Animated.Image> の style プロパティを変更して imageStyle を渡します。
import { ImageSourcePropType, View } from 'react-native';
import { Gesture, GestureDetector } from 'react-native-gesture-handler';
import Animated, { useAnimatedStyle, useSharedValue, withSpring } from 'react-native-reanimated';

type Props = {
  imageSize: number;
  stickerSource: ImageSourcePropType;
};

export default function EmojiSticker({ imageSize, stickerSource }: Props) {
  const scaleImage = useSharedValue(imageSize);

  const doubleTap = Gesture.Tap()
    .numberOfTaps(2)
    .onStart(() => {
      if (scaleImage.value !== imageSize * 2) {
        scaleImage.value = scaleImage.value * 2;
      } else {
        scaleImage.value = Math.round(scaleImage.value / 2);
      }
    });

  const imageStyle = useAnimatedStyle(() => {
    return {
      width: withSpring(scaleImage.value),
      height: withSpring(scaleImage.value),
    };
  });

  return (
    <View style={{ top: -350 }}>
      <GestureDetector gesture={doubleTap}>
        <Animated.Image
          source={stickerSource}
          resizeMode="contain"
          style={[imageStyle, { width: imageSize, height: imageSize }]}
        />
      </GestureDetector>
    </View>
  );
}
上記のスニペットでは、gesture プロパティが doubleTap の値を受け取り、ユーザーがステッカー画像をダブルタップしたときにジェスチャーを発動します。
Android、iOS、web でアプリを確認してみましょう。
タップジェスチャー API の完全なリファレンスについては、React Native Gesture Handler のドキュメントを参照してください。
4
パンジェスチャーを追加する
ステッカー上のドラッグジェスチャーを認識し、その動きを追跡するために、パンジェスチャーを使用します。components/EmojiSticker.tsx で:
- 新しい共有値
translateXとtranslateYを 2 つ作成します。 <View>を<Animated.View>コンポーネントに置き換えます。
export default function EmojiSticker({ imageSize, stickerSource }: Props) {
  const scaleImage = useSharedValue(imageSize);
  const translateX = useSharedValue(0);
  const translateY = useSharedValue(0);
  // ...rest of the code remains same

  return (
    <Animated.View style={{ top: -350 }}>
      <GestureDetector gesture={doubleTap}>
        {/* ...rest of the code remains same */}
      </GestureDetector>
    </Animated.View>
  );
}
上記のコードが何をしているのか確認しましょう。
- 定義した移動量の値で、ステッカーを画面上で移動させます。ステッカーは両軸方向に動くため、X 値と Y 値を追跡する必要があります。
useSharedValue()フックでは、移動量の変数の初期位置を両方とも0に設定しています。これはステッカーの初期位置であり、起点となります。この値は、ジェスチャー開始時のステッカーの初期位置を設定します。
前のステップでは、Gesture.Tap() メソッドにチェーンしたタップジェスチャーの onStart() コールバックを発動させました。パンジェスチャーでは、ジェスチャーがアクティブで動いている間に実行される onChange() コールバックを指定します。
- パンジェスチャーを処理する
dragオブジェクトを作成します。onChange()コールバックはeventを引数として受け取ります。changeXとchangeYプロパティは前回のイベントからの位置変化量を保持し、translateXとtranslateYに格納された値を更新します。 useAnimatedStyle()フックを使ってcontainerStyleオブジェクトを定義します。これは変換の配列を返します。<Animated.View>コンポーネントでは、transformプロパティをtranslateXとtranslateYの値に設定する必要があります。これにより、ジェスチャーがアクティブな間にステッカーの位置が変わります。
const drag = Gesture.Pan().onChange(event => {
  translateX.value += event.changeX;
  translateY.value += event.changeY;
});

const containerStyle = useAnimatedStyle(() => {
  return {
    transform: [
      {
        translateX: translateX.value,
      },
      {
        translateY: translateY.value,
      },
    ],
  };
});
次に、JSX コード内で:
<EmojiSticker>コンポーネントを更新して、<GestureDetector>コンポーネントを最上位のコンポーネントにします。<Animated.View>コンポーネントにcontainerStyleを追加して、変換スタイルを適用します。
import { Gesture, GestureDetector } from 'react-native-gesture-handler';
import Animated, { useAnimatedStyle, useSharedValue, withSpring } from 'react-native-reanimated';
import { ImageSourcePropType } from 'react-native';

type Props = {
  imageSize: number;
  stickerSource: ImageSourcePropType;
};

export default function EmojiSticker({ imageSize, stickerSource }: Props) {
  const scaleImage = useSharedValue(imageSize);
  const translateX = useSharedValue(0);
  const translateY = useSharedValue(0);

  const doubleTap = Gesture.Tap()
    .numberOfTaps(2)
    .onStart(() => {
      if (scaleImage.value !== imageSize * 2) {
        scaleImage.value = scaleImage.value * 2;
      } else {
        scaleImage.value = Math.round(scaleImage.value / 2);
      }
    });

  const imageStyle = useAnimatedStyle(() => {
    return {
      width: withSpring(scaleImage.value),
      height: withSpring(scaleImage.value),
    };
  });

  const drag = Gesture.Pan().onChange(event => {
    translateX.value += event.changeX;
    translateY.value += event.changeY;
  });

  const containerStyle = useAnimatedStyle(() => {
    return {
      transform: [
        {
          translateX: translateX.value,
        },
        {
          translateY: translateY.value,
        },
      ],
    };
  });

  return (
    <GestureDetector gesture={drag}>
      <Animated.View style={[containerStyle, { top: -350 }]}>
        <GestureDetector gesture={doubleTap}>
          <Animated.Image
            source={stickerSource}
            resizeMode="contain"
            style={[imageStyle, { width: imageSize, height: imageSize }]}
          />
        </GestureDetector>
      </Animated.View>
    </GestureDetector>
  );
}
Android、iOS、web でアプリを確認してみましょう。
まとめ
第 6 章:ジェスチャーを追加する
パンとタップのジェスチャーの実装が完了しました。
次の章では、画像とステッカーのスクリーンショットを撮影し、デバイスのライブラリに保存する方法を学びます。