This documentation is available as Markdown for AI agents and LLMs. See the full Markdown index or append .md to any documentation URL.
Introduction to development builds
Edit page
Learn how to create a development build in your Expo project and why use a development build instead of Expo Go.
Create a development build with an AI agent
Paste this into Claude, Cursor, Codex, or another agent.
Build locally
Set up a development build for my Expo project and compile it on my machine.

Run `npx expo install expo-dev-client`, then run `npx expo run:android` or `npx expo run:ios` for the platform I name. Add `--device` to install on a physical device. Start the development server with `npx expo start` once the build is installed.

Run `npx expo prebuild --clean` for the first time to complete development builds setup. Later, use the same command to before rebuilding whenever a native dependency or the app config changes. Match the package manager this project already uses, and report what you ran.

For the introduction to development builds, see https://docs.expo.dev/develop/development-builds/introduction/?buildenv=build-locally.
Build with EAS
Set up a development build for my Expo project and build it on EAS.

Run `npx expo install expo-dev-client`. Check that eas-cli is installed and that I am logged in. Create an eas.json with a development profile if the project has none. For an iOS Simulator build, set `ios.simulator` to true on that profile first. Then stop and ask me: "Everything is installed. Do you want to build now?" Wait for my answer. When I say yes, run `eas build --platform <platform> --profile development` for the platform I name.

Install the finished build on an Android Emulator or iOS Simulator (platform I have specified) when the CLI offers to, then start the development server with `npx expo start`. Match the package manager this project already uses, and report what you ran.

For the introduction to development builds, see https://docs.expo.dev/develop/development-builds/introduction/?buildenv=build-with-eas.
Build locally with EAS CLI
Set up a development build for my Expo project and run the EAS build on my own machine.

Run `npx expo install expo-dev-client`. Check that eas-cli is installed and that I am logged in. Create an eas.json with a development profile if the project has none. For an iOS Simulator build, set `ios.simulator` to true on that profile first. Then stop and ask me: "Everything is installed. Do you want to build now?" Wait for my answer. When I say yes, run `eas build --platform <platform> --profile development --local` for the platform I name.

Install the resulting .apk or .app archive on my emulator or simulator, then start the development server with `npx expo start`. Match the package manager this project already uses, and report what you ran.

For the introduction to development builds, see https://docs.expo.dev/develop/development-builds/introduction/?buildenv=eas-cli-local.
When you create a new Expo app with create-expo-app, you start with a project where you update TypeScript/JavaScript code on your local machine and view the changes in the Expo Go app. A development build is essentially your own version of Expo Go where you are free to use any native libraries and change any native configuration.
A development build is recommended when you want to create your own app and release to app stores. It includes the expo-dev-client library, which augments the built-in React Native development tooling. The tooling also includes support for inspecting network requests and a "launcher" UI that lets you switch between different development servers (such as between a server running on your machine or a teammate's machine) and deployments of your app (such as published updates with EAS Update).
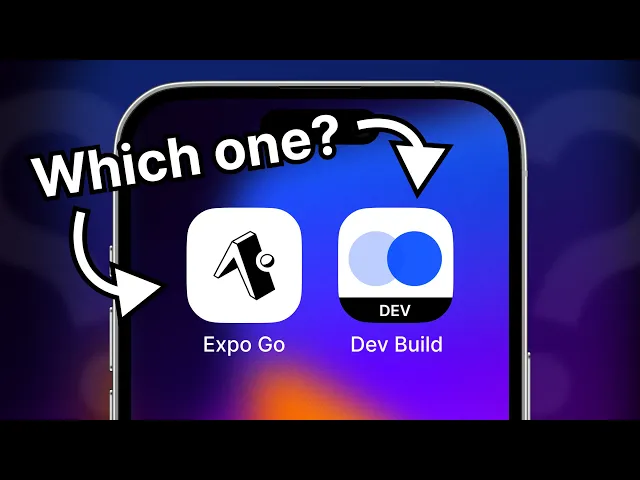
In this tutorial video, Beto explains what each of them is and when to choose a development build.
How would you like to build your development build?
All three methods produce the same development build. They differ in where the app compiles and what you need to have installed on your machine.
Build locally
Compile the app yourself with Expo CLI and your native toolchain. No Expo account is required and this is the only way to install a development build on an iPhone without a paid Apple Developer account.
Host platform support
1 requirement
1 requirement
Set up your development environment for the platforms you build for: Android Studio and Emulator for Android, Xcode and iOS Simulator for iOS.
1
Install expo-dev-client
Run the following command in your project's root directory:
Are you using this library in an existing React Native project?
Apps that don't use Continuous Native Generation or are created with npx react-native, require further configuration after installing this library. See steps 1 and 2 from Install expo-dev-client in an existing React Native project.
What does a development build look like?
It is possible to use development builds without the
expo-dev-clientlibrary. In that case, start the development server withnpx expo start --dev-clientto target your development build instead of Expo Go.
2
Build and run the app
By default the app installs on a running Android Emulator. For a physical device, plug it in via USB, allow USB debugging when prompted, and add the --device flag.
By default the app installs on the iOS Simulator. For an iPhone, plug it in, enable developer mode, make sure your app config has a unique ios.bundleIdentifier, and add the --device flag.
This command runs prebuild to generate the native android and ios directories if they don't exist, then compiles the app, installs it, and starts the development server.
3
Rebuild when native code changes
The expo run:android|ios command reuses the native android and ios directories on later runs. When you only change your app's TypeScript/JavaScript code, there is no need to rebuild the native app. Instead, start the development server with:
You only need to regenerate the native directories (android and ios) when:
- Installing or updating a library containing native code
- Changing your app config (app.json)
- Upgrading your Expo SDK version
In these cases, regenerate the native directories with:
Then, rebuild your app with the updated native code, with:
All Expo build tools (
npx expo run:android|iosandeas build) run prebuild automatically if no native directories exist, so you don't need to run it manually the first time. Learn more about Continuous Native Generation (CNG).
After you install the development build
Launch the development build from your device's Home screen and connect to a development server from the launcher screen to start working on your app. To learn how to use your new build, including the launcher screen, rebuilding, and debugging, see Use a development build. For common questions about development builds and Expo Go, including what you can't do in Expo Go and why, see the FAQ.
Expo Skills for AI agents
If you use an AI agent, install Expo Skills to teach it the workflows on this page:
Build and distribute Expo development clients locally or via TestFlight for internal testing.
Run and control a user's app on a remote iOS/Android simulator hosted on EAS cloud.