Hosting Updates on Your Servers
Edit this page
This doc was archived in August 2022 and will not receive any further updates. Use EAS Update instead. Learn more
Normally, when updates are enabled, your app will fetch updates comprising JavaScript bundles and assets from Expo's CDN. However, there will be situations when you will want to host your JS bundles and assets on your own servers. For example, updates are slow or unusable in countries that have blocked Expo's CDN providers on AWS and Google Cloud. In these cases, you can host your updates on your own servers to better suit your use cases.
For simplicity, the rest of this article will refer to hosting an update for the Android platform, but you could swap out Android for iOS at any point and everything would still be true.
Exporting the update
First, you'll need to export all the static files of your update so they can be served from your CDN. To do this, run expo export --public-url <server-endpoint> in your project directory and it will output all your app's static files to a directory named dist. In this guide, we will use https://expo.github.io/self-hosting-example as our example server endpoint. Asset and bundle files are named by the MD5 hash of their content. Your output directory should look something like this now:
.android-index.jsonios-index.jsonassets1eccbc4c41d49fd81840aef3eaabe862bundlesandroid-01ee6e3ab3e8c16a4d926c91808d5320.jsios-ee8206cc754d3f7aa9123b7f909d94ea.jsHosting your static files
Once you have exported your update's static files, you can host the contents on your own server. For example, in your dist output directory, an easy way to host your own files is to push the contents to GitHub. You can enable GitHub Pages to make your app available at a base URL like https://username.github.io/project-name. To host your files on GitHub, you'd do something like this:
# run this from your project directory- expo export --public-url https://expo.github.io/self-hosting-example# commit output directory contents to your repo- cd dist- git init && git remote add origin git@github.com:expo/self-hosting-example.git- git add * && git commit -m "Update my app with this JS bundle"- git push origin masterTo setup a QR code to view your hosted update, or if you want to host your files locally, follow the instructions below in the 'Loading QR Code/URL in Development' section.
HTTP headers
On some hosting services such as AWS and Firebase, you'll need to explicitly set the header "Content-Type" of JavaScript files as "application/javascript" so that updates work correctly. Otherwise Updates.checkForUpdateAsync() will fail with the error "Failed to fetch new update".
Here's an example of firebase.json configuration, with a deploy target named "native".
{
  "hosting": [
    {
      "target": "native",
      "public": "dist",
+      "headers": [
+        {
+          "source": "**/*.js",
+          "headers": [
+            {
+              "key": "Content-Type",
+              "value": "application/javascript"
+            }
+          ]
        }
      ]
    }
  ]
}
# export your app locally- expo export --public-url https://my-app-native.firebaseapp.com/# deploy the app to firebase- firebase deploy --only hosting:native -m "Deploy my app"Building the standalone app
To configure your standalone binary to pull updates from your server, you'll need to define the URL where you will host your index.json file. When using EAS Build, just set the updates.url property in app.json to point to that url.
Loading QR Code/URL in Development
You can also load an update hosted on your own servers as a QR code/URL into the Expo mobile client for development purposes.
QR code:
The URI you'll use to convert to QR code will be deeplinked using the exps/exp protocol. Both exps and exp deeplink into the mobile app and perform a request using HTTPS and HTTP respectively. You can create your own QR code using an online QR code generator from the input URI.
Here's an example of how you'd do this with a remote server:
URI: exps://expo.github.io/self-hosting-example/android-index.json
QR code: Generate the URI from a website like https://www.qr-code-generator.com/
Here's an example of how you'd do this from localhost:
Run expo export in dev mode and then start a simple HTTP server in your output directory:
# Find your local IP address with `ipconfig getifaddr en0`# export static app files- expo export --public-url http://`ipconfig getifaddr en0`:8000 --dev# cd into your output directory- cd dist# run a simple http server from output directory- python -m SimpleHTTPServer 8000URI: exp://192.xxx.xxx.xxx:8000/android-index.json (find your local IP with a command like ipconfig getifaddr en0)
QR code: Generate a QR code using your URI from a website like https://www.qr-code-generator.com/
URL
If you are loading in your update into a development build by passing in a URL string, you will need to pass in an URL pointing to your JSON manifest file.
Here is an example URL from a remote server: https://expo.github.io/self-hosting-example/android-index.json
Here is an example URL from localhost: http://localhost:8000/android-index.json
Advanced topics
Debugging
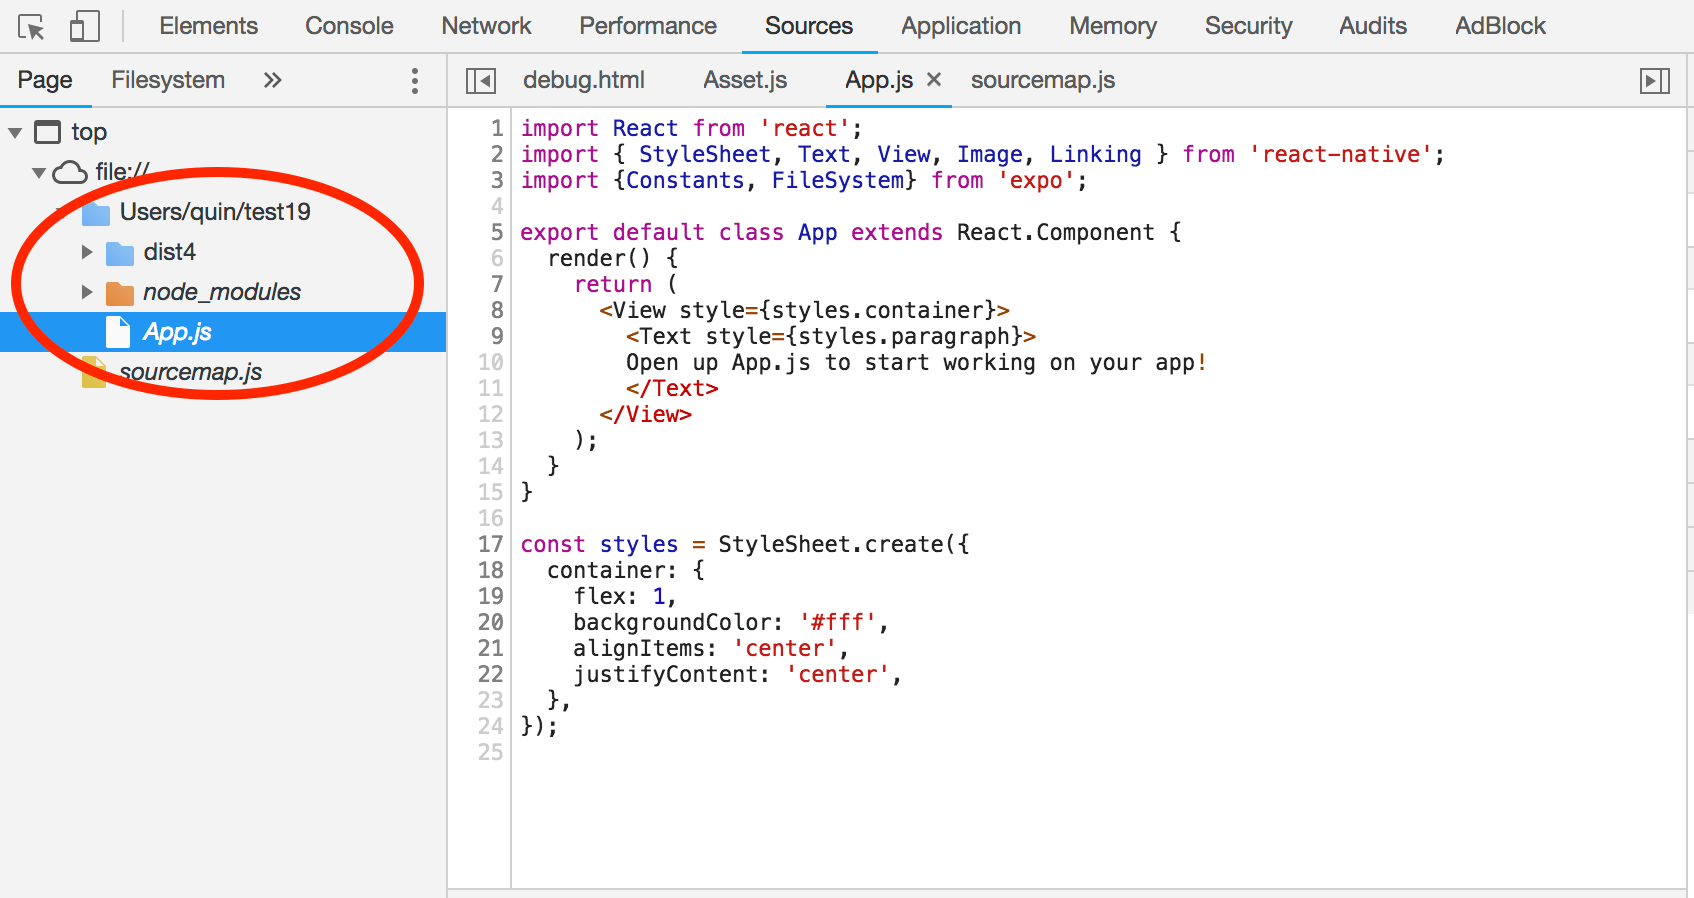
When Expo CLI bundles your update, minification is always enabled. To see the original source code of your update for debugging purposes, you can generate source maps. Here is an example workflow:
- Run
expo export --dump-sourcemap --public-url <your-url>. This will also export your bundle sourcemaps in the bundles directory. - A debug.html file will also be created at the root of your output directory.
- In Chrome, open up debug.html and navigate to the
Sourcetab. In the left tab there should be a resource explorer with a red directory containing the reconstructed source code from your bundle.
Asset hosting
By default, all assets are hosted from an assets path resolving from your public-url (for example, https://expo.github.io/self-hosting-example/assets). You can override this behavior in the assetUrlOverride field of your android-index.json. All relative URL's will be resolved from the public-url.
Special fields
Most of the fields in the index.json files are the same as in app.json. Here are some fields that are notable in index.json:
revisionId,commitTime,publishedTime: These fields are generated byexpo exportand used to determine whether or not an update should occur.bundleUrl: This points to the path where the app's bundles are hosted. They are also used to determined whether or not an update should occur.slug: This should not be changed. Your app is namespaced byslug, and changing this field will result in undefined behavior in the Expo SDK components such asFilesystem.assetUrlOverride: The path which assets are hosted from. It is by default./assets, which is resolved relative to the basepublic-urlvalue you initially passed in.